Reply.io Integration
Simplify outreach & engagement
udu Source offers an integration for Reply.io users, enabling efficient outreach and engagement with key individuals at your target companies. Quickly upload contact data from your udu Source project to your Reply.io sequence with a few clicks.
See instructions below to:

How to set up the Reply.io integration
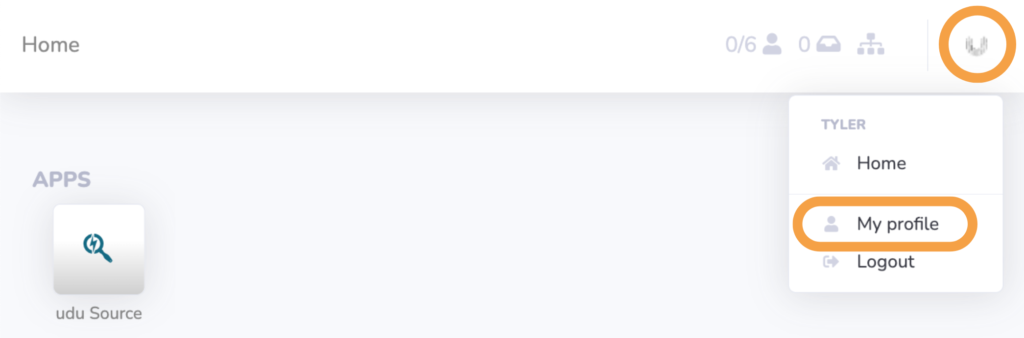
1. After signing into your udu account, click the udu logo at the top right of the screen and select My profile.
2. Locate the Integrations pane on the page. Click Add integration.
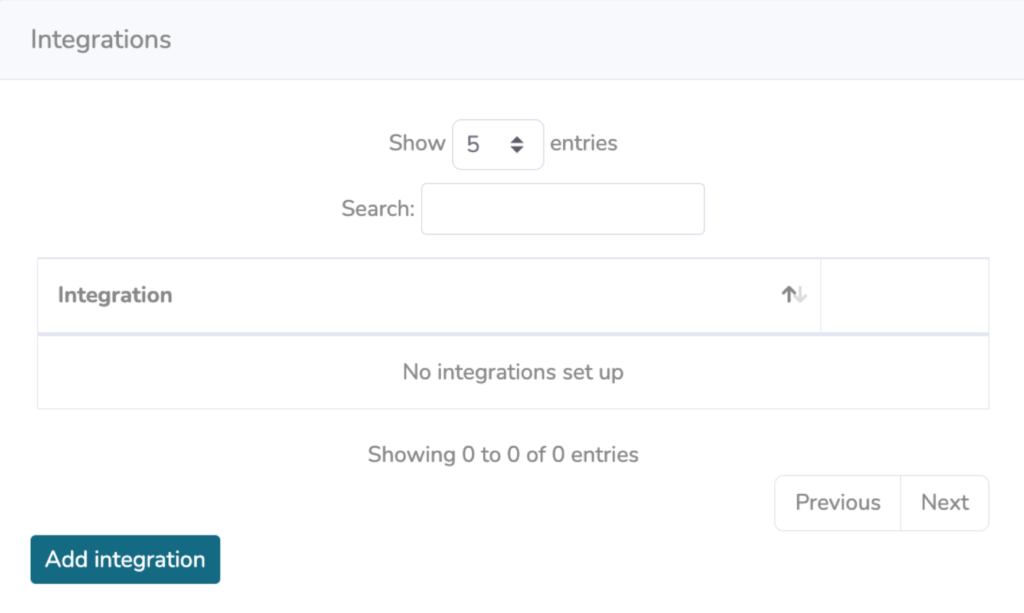
3. Click Reply.io.

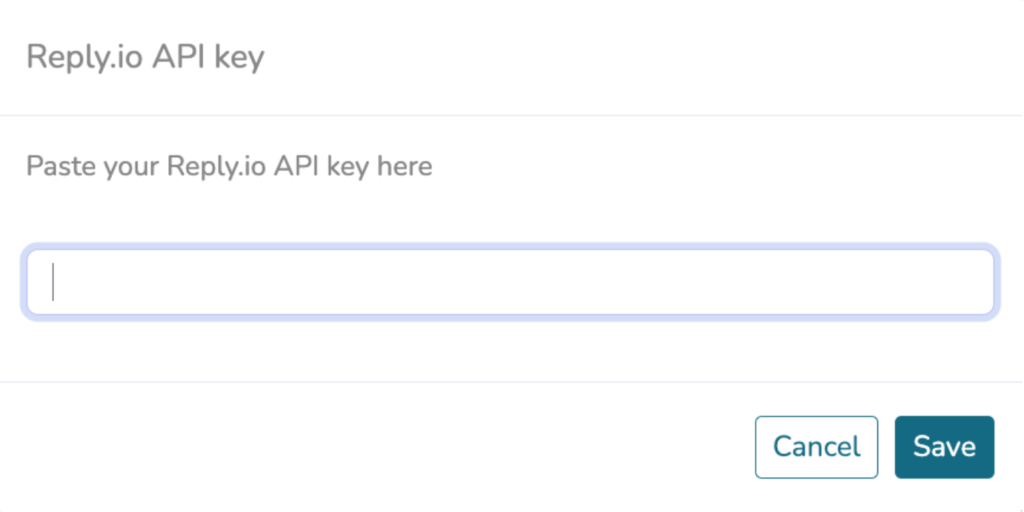
4. Locate your Reply.io API key. You can find it in your Reply.io account at Settings > API Key. Or, while signed into Reply.io use this link.
5. Copy the API key and paste it into the udu dialog box. Click Save.
6. Your udu account is now integrated with Reply.io.
How to upload contacts to Reply.io
1. Open your project in udu Source.
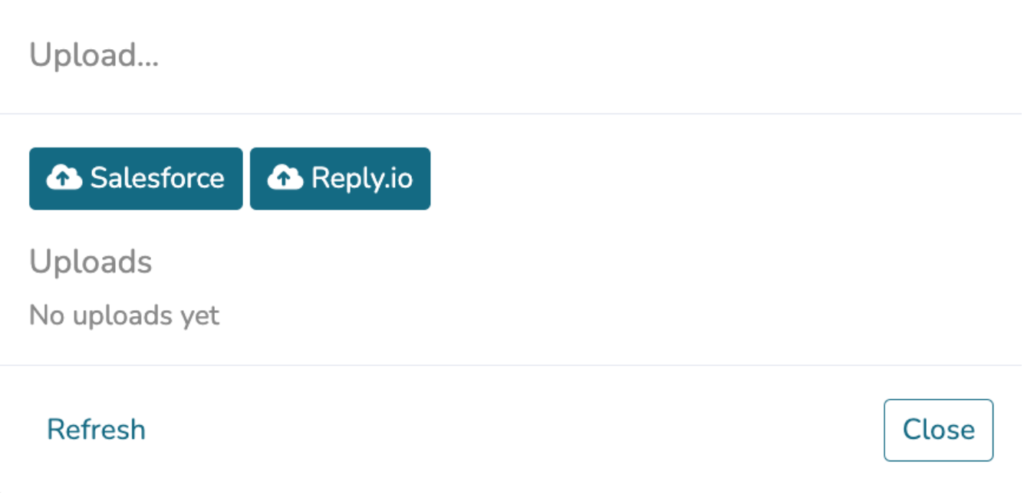
2. Click the vertical ellipsis icon by the search bar and select Upload… from the dropdown menu.
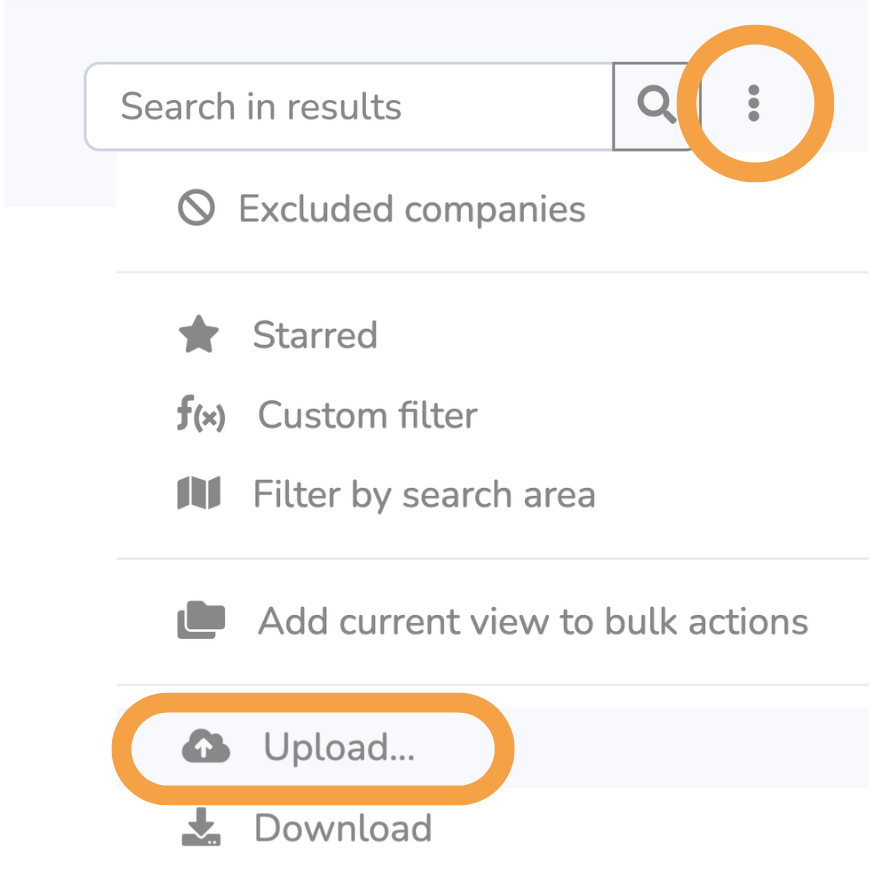
3. Click Reply.io.
Upload to Contacts or to a sequence
You can choose to upload contacts from your udu Source project to your general Contacts in Reply.io or upload directly to a specific sequence. Under Choose sequence:
1. To upload to your Contacts, select No sequence – Upload directly to contacts
2. To upload directly into an existing sequence, select that sequence.
If contacts already exist in a Reply.io sequence, you can choose whether to overwrite them with the contact details udu Source provides. Under Overwrite sequence:
1. To overwrite contacts with udu Source data, select True.
2. To keep existing contact details, select False.
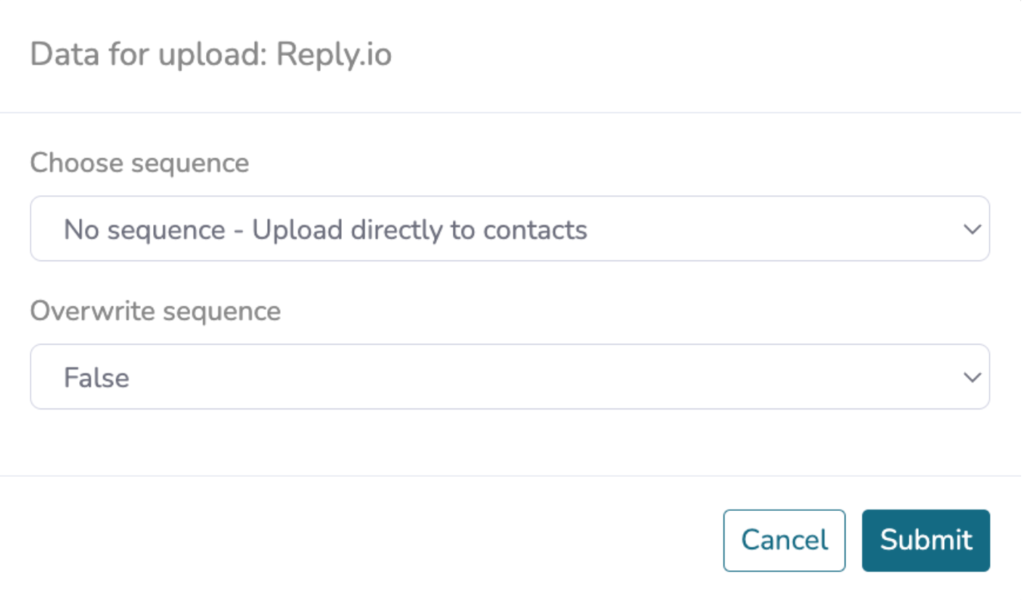
3. After making your selections, click Submit to upload contacts to your Reply.io account.